Growing Microgreens at home is very easy. As long as you have the right equipment, you’ll be successfully growing Microgreens in no time! Microgreens are simply freshly germinated vegetable seeds that are generally no older than 15 days old (from the day you sow your seeds to the day you harvest the greens).

Product Links:
Buy Your Microgreen Seeds Here | Buy your Microgreen Kit Here
What do Microgreens taste like?
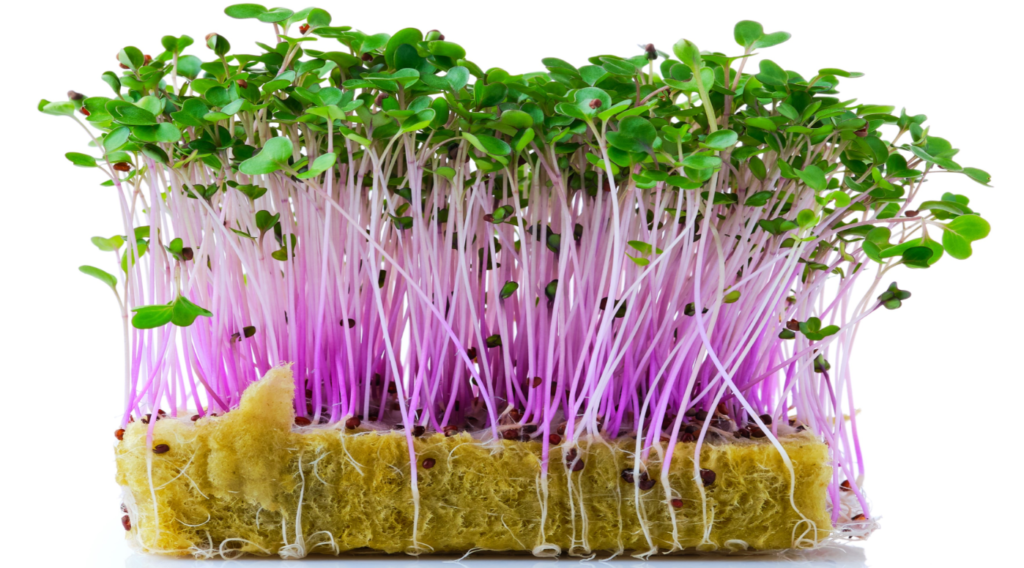
Microgreens are amazingly delicious and taste exactly like their fully grown counterparts! If you grow radish microgreens, they will be a bit spicy and resemble the same flavor of a fully grown radish. Broccoli microgreens taste like broccoli, Sunflower microgreens taste like sweet sunflower seeds, and so on.
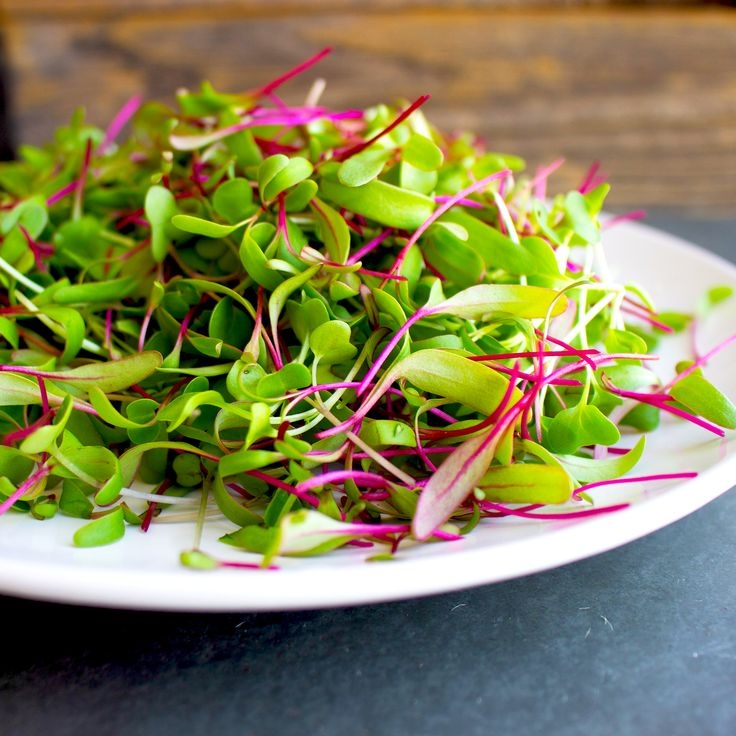
We also offer various lettuce mix microgreen varieties, in which a little bowl of microgreens resembles and tastes like a miniature bowl of salad, except up to 40 times more nutritious! Once you’re comfortable growing microgreens, you can get as creative as you like and sow various types of seeds together. Simply place the different seeds in a cup, mix and sow. This will create a custom microgreen blend.
Pictured to the right is a custom blend of Red Russian and Blue Vates Kale. Not only a beautiful presentation, but very tasty and nutritious as well!
PRO TIP: When creating microgreen blends, be aware of the germination time for each variety. For example, lettuce may only take 10 days while sunflower seeds can take up to 20 days. Try to keep the blend of seeds with similar harvest times.
Instructions for Growing Microgreens using our Kit

Microgreens are up to 40 times more nutritious than fully grown vegetables! That means, a little goes a long way, as they are packed with all kinds of valuable nutrients! You can grow various types of Microgreens; some commonly grown varieties include Lettuce Mix, Broccoli, Cabbage, Radish, Kale, Cilantro, Beets, and even Sunflowers!
This guide will show you how to grow Microgreens using our 10×10 Microgreen Grow Kit. The kit comes with everything you need to grow a bountiful harvest of Microgreens.
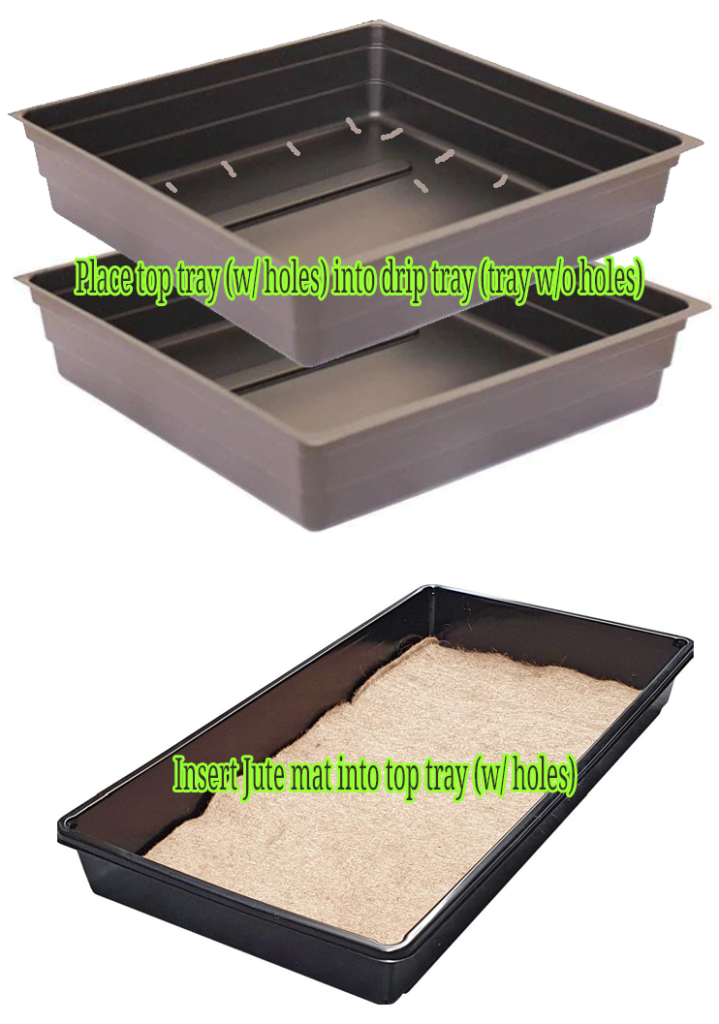
The kit, pictured to your left, includes two 10 inch x 10 inch trays (one with drain holes and the other to be used as the drip tray), spray bottle, Jute grow mats and plenty of seeds for 3 grows.
Each seed packet that comes in the kit is premeasured, meaning you will use the entire packet for each new grow you start. You can buy replacement seeds and Jute pads here.
Preparation
Find a location for your microgreens to grow. They do need light, so if you’re not using artificial light (such as a grow light), you’ll want to place your growing tray near a sunny window.
Fill your spray bottle with water.
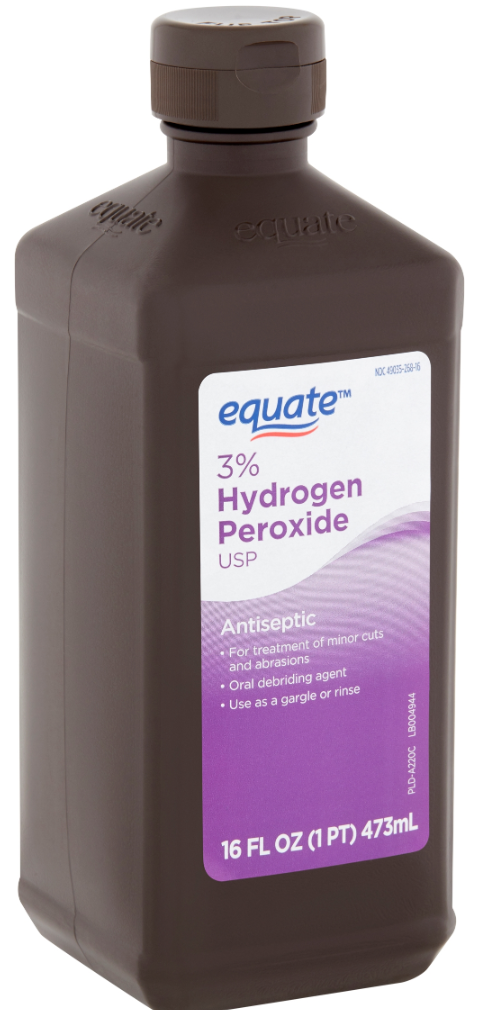
PRO TIP: Add 1 tablespoon of Hydrogen Peroxide to every 1 cup of water in your spray bottle. Adding this little bit of Hydrogen Peroxide helps prevent mold from growing on your microgreens. It also helps increase overall germination, however we’re most concerned about ensuring mold is kept at bay, as germination generally is not a problem.
Fill your spray bottle with water up to the 25 FL OZ line, and then add 3 tablespoons of Hydrogen Peroxide. This is the ideal ratio and will help prevent mold from growing on your Microgreens. It’s best to use the entire SPRAY bottle of the mixture you made prior to adding more water or Hydrogen Peroxide, as this will ensure the proper water to Hydrogen Peroxide ratio is correct. You will use this mixture for your entire growing process, including misting your Microgreens daily (or as needed).
Step 1 – Arrange trays and prep the Jute mat
Let’s get everything setup and in place…
The tray without holes is your bottom drip tray. This will catch any excess water that drains from the top tray with holes (the tray in which your microgreens will grow in). Allowing water to drain down into the bottom tray helps prevent mold and also prevents overwatering. Be sure to check the bottom tray after each watering to ensure no excess water is sitting in there.
Now that your two trays are setup, take one piece of Jute grow medium and place it into the top tray. In case you’re wondering what a Jute mat is made of, it’s an organic and natural material made from the Jute plant. The fibers are spun into sheets, which are then cut to size for growing microgreens. Jute mats also make it really easy to grow microgreens, not only throughout the growing process but also the harvesting process, as well as the final clean up. More about that when we go to harvest…
Step 2 – Prep your Jute mat
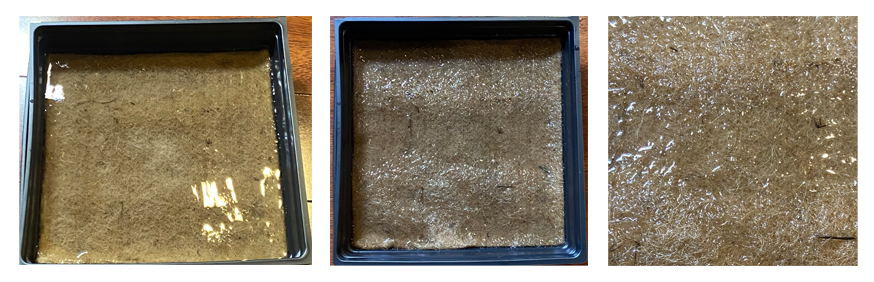
Now that the Jute mat is in place, it’s time to condition it with water. Jute is very dry and absorbs water very slowly, again making it a great grow medium for microgreens (as sitting water produces mold).
Prepping your Jute mat is simple; however, we recommend following the process below for best results:
With your trays together and Jute mat in place, fill top tray with water so that it covers the entire mat (fill with water about 1/2 inch above mat). If the inside of the mat is dry and not evenly moist, you may experience uneven microgreen growth, so it’s best to ensure the entire mat is saturated with water. Because Jute slowly absorbs water, you’re going to want to allow the mat to soak in the water for about an hour or so. Some growers prefer to allow it to soak overnight – whichever method you prefer, just make sure the mat is entirely wet. Generally, one hour is enough time for your Jute mat to become fully saturated.
PRO TIP: Add 2 or 3 tablespoons of Hydrogen Peroxide to the water you’re using to saturate the mat with. This will help prevent future mold from growing.
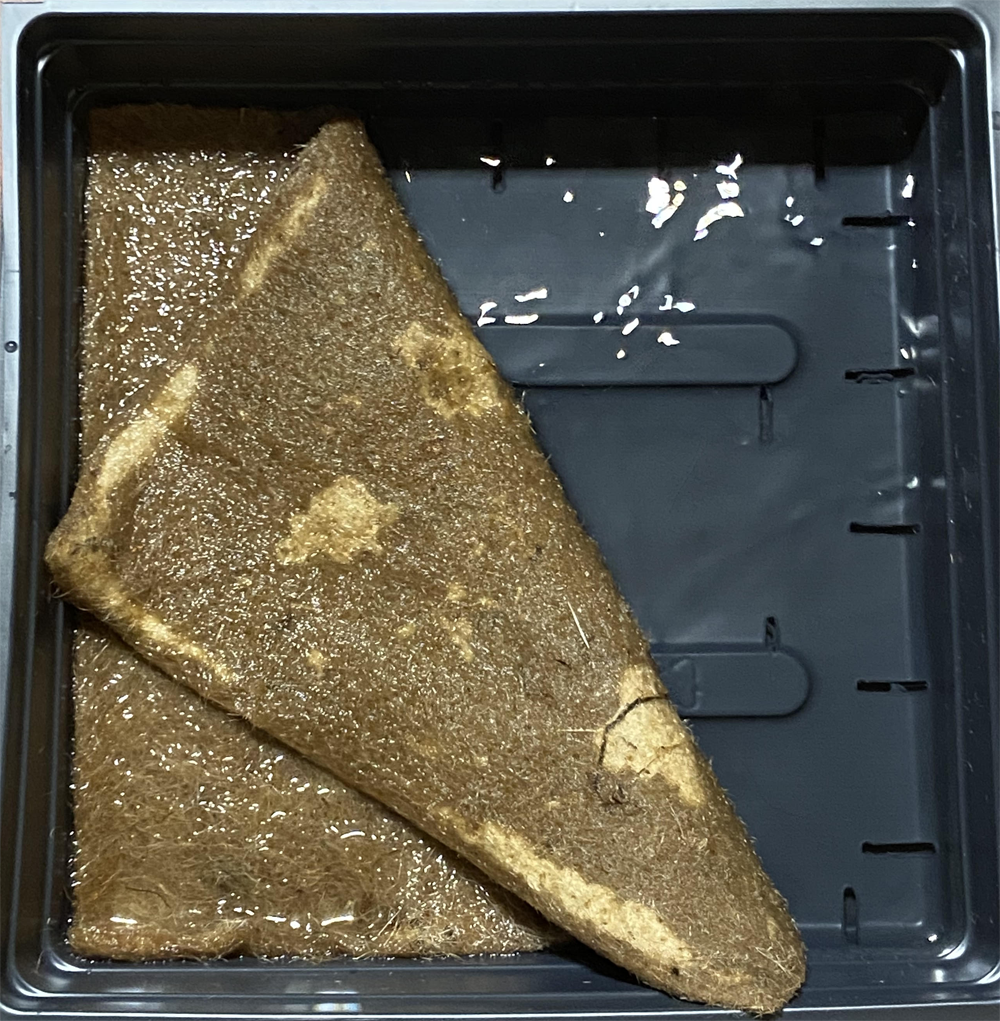
Once your Jute mat has been sitting in water for a while, be sure to flip it over and take a look at the underside. If you see any light-colored sections (as shown on the Jute mat to the left) that means, there are still dry sections on the mat and it’s not ready yet.
You can speed up absorption of water by squeezing the light sections and allowing them to more quickly absorb the water as they expand out again. Think of ringing out a rag and then placing it back into water; it reabsorbs the water.
Once the mat has fully absorbed the water, remove it from the tray and gently/moderately squeeze out any excess water. The goal is to keep the mat damp but not dripping wet. Also, be sure to empty both trays of any excess water. No water should be in either of the trays (you do not need to towel-dry it, just empty it). Place mat back into top tray and proceed to next step.
Step 3 – Sow your seeds
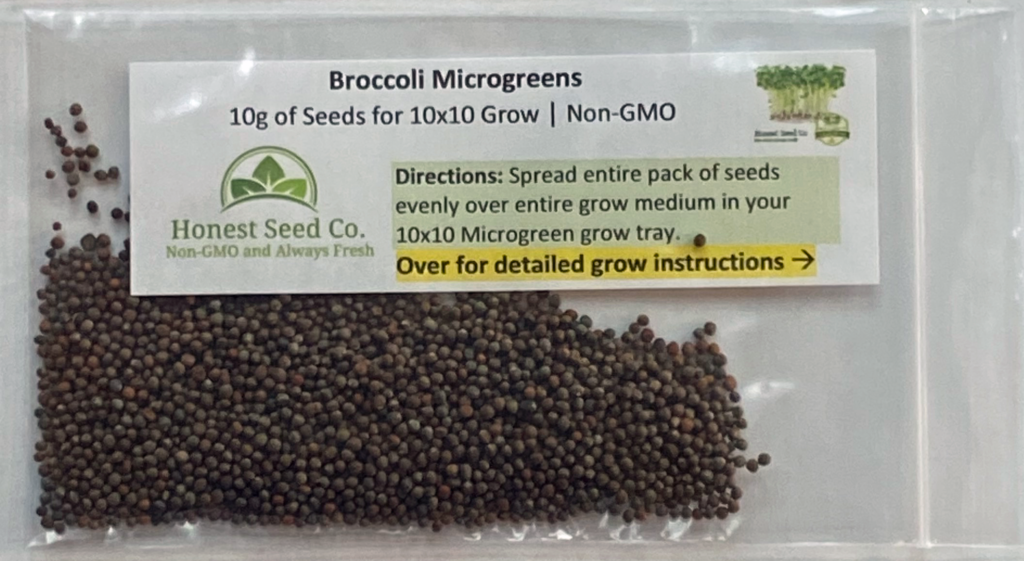
Now that your trays and mat are ready, it’s time to sow some seeds! If you purchased our kit, you received three different microgreen seed varieties. The seed packs you received are premeasured for your 10×10 grow tray, meaning you’ll use all of the seeds in the pack.
Please note, we provide more seeds than needed, to ensure a nicely condensed grow and bountiful harvest. If this is your first time growing, do not mix and match seeds, simply choose which variety you wish to grow, and evenly sprinkle the entire pack (only 1 pack) onto the jute mat. Try to sprinkle them as evenly as possible, however keep in mind that it does not have to be perfect. You can use your fingers to spread the seeds out evenly if need be. Keep it fun, and don’t take it too seriously! This is easy…
Step 4 – Water your freshly sowed microgreen seeds and prepare for germination
Now that your seeds are spread evenly throughout the mat, gently mist them using your spray bottle. Be sure to not over water them, as it will cause mold to grow and hinder overall germination. Feel free to pick up the top tray and see if there is any excess water on the bottom (drip) tray. If there is, empty it, and place the top tray back into the bottom tray.
PRO TIP: The initial germination process is a crucial step that takes 2-3 days from start to finish. Seeds germinate best in a dark, humid environment. Take a piece of tin foil and cover the top of the tray. This will keep the seed environment dark and humid for optimal germination.
Remove foil daily and lightly mist with water if need be.
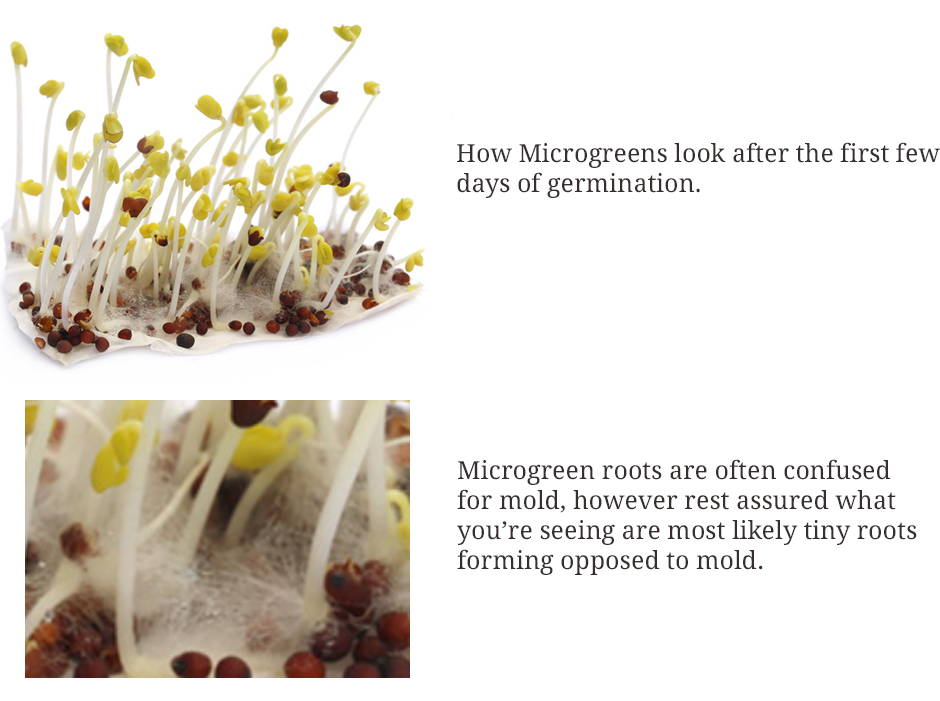
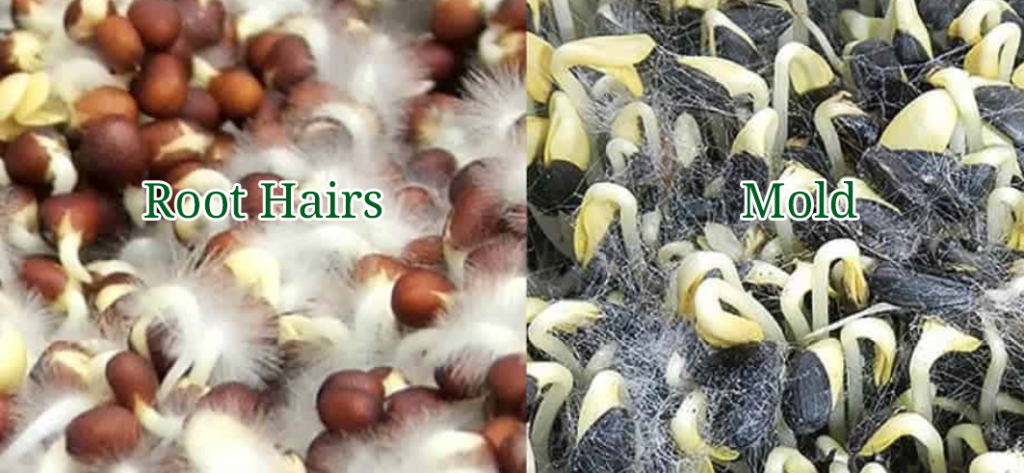
After about 3 days, you should see germination. Don’t be concerned if it looks like mold has covered your entire tray, as chances are what you’re seeing are the tiny roots developing. They are very thin, hair-like roots which are often confused for mold. See below for more details.
At this point, you can remove the foil, and place your microgreens either under strong artificial light or near a sunny window.
Mold or Roots?
Below are examples of roots vs mold. Keep in mind, if you’re using our suggested Water Hydrogen Peroxide mixture, it’s highly unlikely you’ll encounter mold as the hydrogen peroxide prevents mold growth. It’s still important NOT to overwater your microgreens, as excess water will cause mold growth.
Step 5 – Growing your Microgreens
Now that your seeds have germinated and you’re off and running, allow your microgreens to grow for at least 7 days. The general rule of thumb is around 10 days in total; however, some varieties may take a little longer. There is nothing wrong with allowing your microgreens to grow longer, they will just continue to develop and grow larger. It’s really up to you as to when you’d like to harvest them.
Step 6 – Harvesting, Storing and Consuming Microgreens
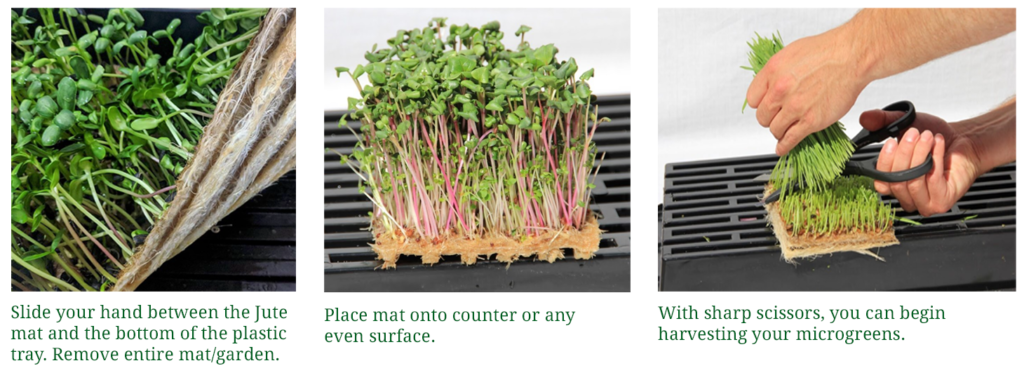
Congratulations, you made it to the harvest stage! Your microgreens should now have filled the entire tray. If you are planning to consume all of the microgreens at once, simply reach your hand below the Jute mat and gently remove it from the tray. Place the mat onto a cutting board or flat surface. This will be your entire microgreen garden, at which point you can easily use scissors to cut away the stems from the mat. The entire microgreen garden is edible, however always cut a little above the mat, as you do not want to eat the Jute (or any other grow medium).
No need to wash your microgreens prior to consumption, assuming they were grown in a clean indoor environment.
PRO TIP: Microgreens will stay fresh in the refrigerator for 7-14 days post-harvest. You can even place the entire tray into the refrigerator and cut/harvest as needed. Placing your fully developed microgreen garden in the refrigerator will not only slow growth way down, but it will also keep them fresh and crisp.
This is true “farm to table” eating!
If you would rather harvest all of the microgreens at once (harvest as in cut them from the mat), you may do so, and then place them in a vegetable container in the refrigerator. Generally, they’ll last at least 7 days like this, as long as you cover them with a lightly dampened paper towel, so that they remain moist. Otherwise, they’ll dry out, as the refrigerator is a dehumidifier. Place in the crisper for safe keeping.
If you have any questions at all, please contact us! We are here to help. 🙂
Thank you!